
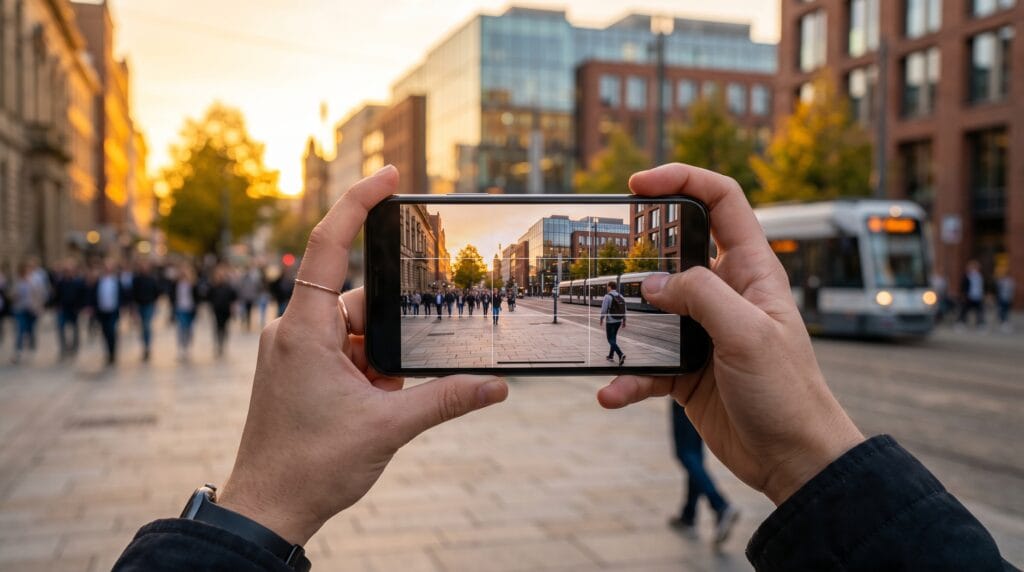
A practical mobile photography tutorial can help creators take better photos without investing in expensive camera equipment. Modern smartphones are capable of producing sharp, detailed, and visually appealing images when you understand how to control light, composition, focus, exposure, and editing. The biggest difference usually comes from technique rather than the price of the phone.
For creators, smartphone photography is especially useful because the camera is always available. You can capture products, portraits, travel moments, lifestyle content, behind-the-scenes scenes, food, and social media visuals without carrying a full photography setup.
The goal is not to make a phone behave exactly like a professional camera.
Instead, learn how to use its strengths.
This mobile photography tutorial covers the essential techniques creators can use to make smartphone images look cleaner, more intentional, and more professional.
Why Mobile Photography Matters for Creators
Creators often need new visuals quickly.
A smartphone makes it possible to shoot, edit, and publish from one device.
Mobile photography can be useful for:
- TikTok
- Blogs
- Product pages
- Personal brands
- Travel content
- Food content
- Behind-the-scenes posts
- Small business marketing
Strong mobile photography tutorial techniques also improve visual consistency.
Once you understand lighting and composition, you can create better images even when working with different phones.
The most important skills transfer across devices.
Start the Mobile Photography Tutorial by Cleaning the Lens
This sounds simple, but it makes a noticeable difference.
Smartphone cameras are constantly exposed to fingerprints, dust, and oils because the device is handled throughout the day.
A dirty lens can make images look:
- Soft
- Hazy
- Low contrast
- Flared
Before shooting, gently clean the camera lens with a suitable soft cloth.
This takes seconds and can immediately improve image clarity.
Learn Your Smartphone Camera
Before focusing on creative techniques, understand what your phone can do.
Depending on the device, camera features may include:
- Main wide camera
- Ultra-wide camera
- Telephoto camera
- Portrait mode
- Night mode
- Macro mode
- Pro or manual controls
- RAW capture
- Exposure adjustment
You do not need every feature for every image.
The main camera often provides the best overall image quality because it usually has the strongest sensor and lens combination.
A useful mobile photography tutorial begins with understanding when simpler settings are enough.
Use the Main Camera Whenever Possible
The main rear camera is usually the safest choice for quality.
Use ultra-wide or telephoto lenses when they improve the composition, not simply because they are available.
Ultra-wide cameras are useful for:
- Architecture
- Interiors
- Landscapes
- Dramatic perspective
Telephoto lenses can work well for:
- Portraits
- Details
- Distant objects
- Compressed backgrounds
Avoid excessive digital zoom because it can reduce detail.
If the phone does not have an optical telephoto camera, physically moving closer may produce a better result when possible.
Mobile Photography Tutorial for Better Lighting
Lighting has more impact on image quality than most camera settings.
Smartphones perform especially well when they have enough light.
Look for:
- Window light
- Open shade
- Golden hour
- Soft cloudy light
- Reflected light
Avoid assuming that brighter always means better.
Strong midday sunlight can create harsh shadows and blown highlights.
Soft directional light usually creates a more flattering and controlled image.
Use Window Light Indoors
Window light is one of the easiest ways to improve indoor smartphone photography.
Position your subject near a large window.
Turn off unattractive overhead lighting if it creates mixed colors or harsh shadows.
Try positioning the subject:
- Facing the window
- At a 45-degree angle
- Side-lit by the window
Each position creates a different mood.
This mobile photography tutorial technique works well for portraits, food, products, crafts, and lifestyle content.
Photograph During Golden Hour
Golden hour occurs around sunrise and sunset when the sun is lower in the sky.
The light often appears:
- Warmer
- Softer
- More directional
- More flattering
For portraits, place the sun behind or slightly beside your subject.
For landscapes, watch how the low light creates texture and longer shadows.
Golden hour is especially useful for travel and lifestyle creators who want natural warmth without heavy editing.
Use Open Shade for Softer Portraits
Open shade can provide smooth light while avoiding harsh direct sun.
Good locations may include:
- Beside a building
- Under a covered entrance
- Near a large doorway
- Beneath an awning
Keep your subject facing toward an open area where soft daylight can reach the face.
Avoid deep shade where the background is extremely bright because the phone may struggle to balance exposure.
Also Read: Photoshop Retouching Tips for Better Portraits
Mobile Photography Tutorial for Focus and Exposure
Smartphones automate many settings, but creators should still control focus and brightness.
Tap the main subject on the screen to set focus.
On many phones, you can then adjust exposure by dragging the brightness control up or down.
Protect Bright Highlights
Phone cameras can often recover moderate shadow detail more easily than completely blown highlights.
If the sky or bright clothing loses all texture, reduce exposure slightly.
This is particularly important in high-contrast scenes.
A slightly darker image can often be adjusted during editing.
Lock Focus and Exposure When Needed
Some phone cameras allow you to lock focus and exposure by pressing and holding the subject.
This can help when:
- Recording several similar photos
- Reframing the camera
- Shooting a moving subject through one area
- Keeping product photography consistent
Without a lock, the phone may change brightness every time the composition moves.
Exposure consistency is important when creating a series of images for a carousel or product collection.
Turn On the Grid
Grid lines help with composition.
The rule-of-thirds grid divides the frame into nine sections.
You can use it to position:
- Faces
- Horizons
- Products
- Buildings
- Important details
The subject does not always need to sit in the exact center.
Placing important elements near grid intersections can create a more balanced composition.
However, the grid is a guide rather than a strict rule.
Mobile Photography Tutorial for Better Composition
Composition determines how objects relate inside the frame.
Good composition makes the image feel deliberate.
Useful techniques include:
- Rule of thirds
- Leading lines
- Symmetry
- Negative space
- Frames within frames
- Layering
- Centered composition
Experiment with several approaches rather than taking only one version.
Creators often benefit from shooting both vertical and horizontal variations.
Use Leading Lines
Leading lines guide the viewer toward the main subject.
Look for:
- Roads
- Walls
- Railings
- Tables
- Shadows
- Buildings
- Paths
Position the camera so the lines naturally point toward your subject.
Leading lines are especially effective for travel, architecture, street photography, and environmental portraits.
Use Negative Space
Negative space is the relatively empty area around a subject.
It can make an image feel cleaner and help the subject stand out.
Negative space is particularly valuable for creators because empty areas can later hold:
- Headlines
- Quotes
- Product information
- Social media text
- Website copy
If you know a photo will become a blog cover or promotional graphic, plan for text placement while shooting.
Try Symmetrical Composition
Symmetry creates a strong sense of order.
It works well for:
- Architecture
- Interiors
- Product photography
- Food
- Reflections
Stand directly in the center and carefully align the frame.
Small alignment errors become especially obvious in symmetrical images.
Use grid lines to help keep vertical and horizontal elements straight.
Change Your Shooting Angle
One of the easiest ways to make mobile photography more creative is to move.
Do not take every photo from normal standing eye level.
Try:
- Low angles
- High angles
- Top-down views
- Close-ups
- Side angles
A lower angle can make architecture or people feel more dramatic.
A top-down angle works well for food, desks, products, and flat lays.
Different perspectives can transform an ordinary subject into stronger content.
Mobile Photography Tutorial for Portraits
Smartphones can create excellent portraits when lighting and distance are handled carefully.
Avoid placing the camera extremely close to a person’s face with the widest lens.
This can exaggerate facial proportions.
Instead, step back slightly and use the normal or telephoto camera when available.
Focus on the Eyes
Tap the subject’s eye or face before taking the image.
Clear eyes make portraits feel more engaging.
For profile or angled portraits, prioritize the eye closest to the camera.
Use Portrait Mode Carefully
Portrait mode simulates shallow depth of field by separating the subject from the background.
It can work well, but always inspect the edges.
Complex areas such as:
- Hair
- Glasses
- Fingers
- Clothing
- Plants
may occasionally create unnatural blur boundaries.
Take a normal photo as well.
This gives you another option if portrait mode produces artifacts.
Choose Better Backgrounds
Before taking the photo, look behind the subject.
Check for:
- Poles
- Signs
- Bright lights
- Trash
- Distracting people
- Clutter
Sometimes moving a few steps creates a much cleaner image.
Background awareness is one of the most important lessons in any mobile photography tutorial because phone cameras often keep more of the scene visible than large-sensor cameras.
Mobile Photography Tutorial for Product Photos
Creators and small businesses can use smartphones for strong product imagery.
Start with:
- Clean background
- Soft natural light
- Stable camera position
- Consistent framing
Use white foam board or another neutral surface to reflect light into shadows if necessary.
Shoot several views:
- Front
- Side
- Detail
- In-use
- Lifestyle
Consistency is particularly important for ecommerce listings.
Photograph Food Near Natural Light
Food photography often looks better with directional side lighting.
Place the dish near a window rather than directly under strong ceiling lights.
Try shooting at:
- 45 degrees
- Table level
- Top-down
Different dishes benefit from different perspectives.
Flat foods such as pizza may work well from above, while burgers and layered desserts often look better from a lower angle that shows their height.
Avoid Using the Flash Automatically
Built-in phone flash can produce flat lighting and hard shadows.
Whenever possible, use available light instead.
Flash can still be useful in specific creative situations, especially for intentional direct-flash aesthetics.
But for general product, food, and portrait photography, natural or continuous light often produces more flattering results.
Mobile Photography Tutorial for Night Photos
Low-light photography is more challenging because smartphones need longer exposure times or heavier computational processing.
Use night mode when appropriate.
Hold the phone as steadily as possible.
If available, use:
- Tripod
- Stable table
- Wall support
- Phone stand
Avoid moving the phone until the capture finishes.
Even small movement can reduce sharpness.
Use Reflections Creatively
Reflections can add visual interest.
Look for:
- Windows
- Mirrors
- Water
- Glass tables
- Polished surfaces
Reflections can introduce symmetry, depth, or abstract shapes.
Creators can use them for fashion, travel, architecture, and lifestyle photography.
Keep the phone positioned carefully so your own reflection does not appear unintentionally.
Use Burst or Continuous Shooting for Action
Moving subjects are difficult to capture in a single frame.
Use burst or continuous shooting when available for:
- Sports
- Walking portraits
- Pets
- Children
- Street moments
- Jumping shots
Capture several images, then select the frame with the strongest expression and body position.
This increases your chances of getting a sharp, natural moment.
Create Natural Movement in Portraits
Static posing can sometimes make smartphone portraits feel stiff.
Ask your subject to:
- Walk
- Turn around
- Adjust clothing
- Look away
- Move their hair
- Laugh naturally
Shoot during the movement.
Natural transitions often create stronger images than perfectly held poses.
Also Read: How to Make a Poster Design That Looks Eye-Catching
Mobile Photography Tutorial for Editing
Editing should improve the photo rather than completely rescue a weak one.
Start with basic adjustments:
- Exposure
- Contrast
- Highlights
- Shadows
- White balance
- Saturation
- Crop
- Straightening
Avoid pushing every slider too far.
The goal is usually to create a cleaner, more balanced version of the image.
Use Lightroom Mobile
Adobe Lightroom Mobile provides useful controls for photographers and creators.
You can adjust:
- Light
- Color
- Curves
- Individual color ranges
- Detail
- Lens corrections
- Cropping
Presets can speed up editing, but do not apply the same preset blindly to every image.
Lighting conditions vary.
Adjust each photo when necessary.
Use Snapseed for Quick Editing
Snapseed provides a range of mobile editing tools and can be useful for fast adjustments.
Features can help with:
- Exposure
- Selective edits
- Curves
- Healing
- Perspective
- Black-and-white conversions
Selective editing is especially useful when one part of the image needs attention without changing everything else.
Keep Skin Tones Natural
When editing portraits, be careful with:
- Saturation
- Orange tones
- Skin smoothing
- Sharpening
Over-editing skin can make people look unnatural.
Reduce temporary distractions if appropriate, but keep realistic texture.
Consistency is more important than creating perfectly smooth skin.
Develop a Consistent Editing Style
Creators can make their visual content more recognizable by developing a consistent style.
This may involve:
- Similar contrast
- Repeated color palette
- Consistent warmth
- Similar saturation
- Matching crop ratios
Do not force every photo to look identical.
Instead, create a family resemblance across your content.
A consistent style can strengthen a personal brand or business feed.
Mobile Photography for Instagram and Social Media
When shooting for social platforms, consider the final format.
Vertical compositions work well for:
Square or portrait images can work well for feed posts.
Leave enough space around the subject to allow cropping.
Do not frame every image so tightly that it becomes impossible to adapt later.
Shoot More Than One Composition
Do not stop after the first acceptable image.
Try:
- Wide shot
- Medium shot
- Close-up
- Detail
- Vertical
- Horizontal
This gives you more flexibility when creating content later.
One photography session can then provide images for a blog post, social carousel, website, and promotional graphic.
Helpful Tools for Mobile Photography
A few tools can make smartphone photography easier.
Small Tripod
Useful for night photography, product photos, self-portraits, and video.
Phone Clamp
A secure phone clamp can help attach the phone to tripods and stands.
Portable LED Light
A small continuous light can improve indoor product photography and portraits when natural light is unavailable.
Reflector
A compact reflector can help brighten shadows.
Even white foam board can work for simple home setups.
Lightroom Mobile
Useful for more controlled photo editing and consistent color treatment.
Snapseed
Helpful for quick editing and local adjustments.
Canva
Useful for turning finished photos into social posts, thumbnails, blog graphics, and promotional content.
You do not need every accessory.
The strongest mobile photography tutorial skills still come from understanding light, composition, and timing.
Common Mobile Photography Mistakes
Using Digital Zoom Too Often
Move closer or use an optical camera when possible.
Ignoring the Background
Always inspect the complete frame.
Overexposing the Sky
Reduce exposure when bright highlights lose detail.
Overediting Photos
Heavy saturation and sharpening can make images look unnatural.
Photographing Everything at Eye Level
Experiment with height and perspective.
Using Harsh Light Without a Reason
Look for softer light or open shade.
Forgetting to Clean the Lens
This simple mistake can reduce clarity dramatically.
Mobile Photography Tutorial Checklist
Before taking or publishing a photo, confirm that:
- The lens is clean.
- The subject is clearly defined.
- Lighting supports the image.
- Focus is accurate.
- Exposure protects important highlights.
- The background is free from major distractions.
- The composition feels intentional.
- The horizon is straight when appropriate.
- The chosen lens fits the subject.
- Digital zoom has been avoided when possible.
- Several angles have been captured.
- Editing remains natural.
- Color is consistent with your visual style.
- The image fits the intended platform.
- A high-quality original has been saved.
Also Read: CapCut Tutorial for Better Video Editing Results
Final Thoughts
A strong mobile photography tutorial does not depend on having the newest or most expensive smartphone.
Better images come from learning how to see light, control exposure, choose backgrounds, compose intentionally, and recognize the right moment to press the shutter.
Start with simple improvements.
Clean the lens. Use the main camera. Find soft natural light. Tap to focus. Reduce exposure when highlights become too bright. Then move around until the composition feels intentional.
For portraits, focus on expression and flattering light.
For products and food, prioritize consistency and clear presentation.
For social content, capture multiple orientations and leave enough room for future crops or typography.
Finally, edit with restraint.
A smartphone already handles a large amount of image processing automatically, so thoughtful small adjustments are often enough.
Continue practicing the techniques in this mobile photography tutorial, review your favorite images, and identify why they work.
Over time, you will become faster at recognizing good light, stronger compositions, and useful creative opportunities.
The phone in your pocket can become a powerful visual tool when technique, observation, and consistent practice come together.
For high-quality fonts to boost your income, check out Letter Crafted. Our professional fonts are perfect for branding, marketing, and content creation. So, don’t miss this opportunity.