
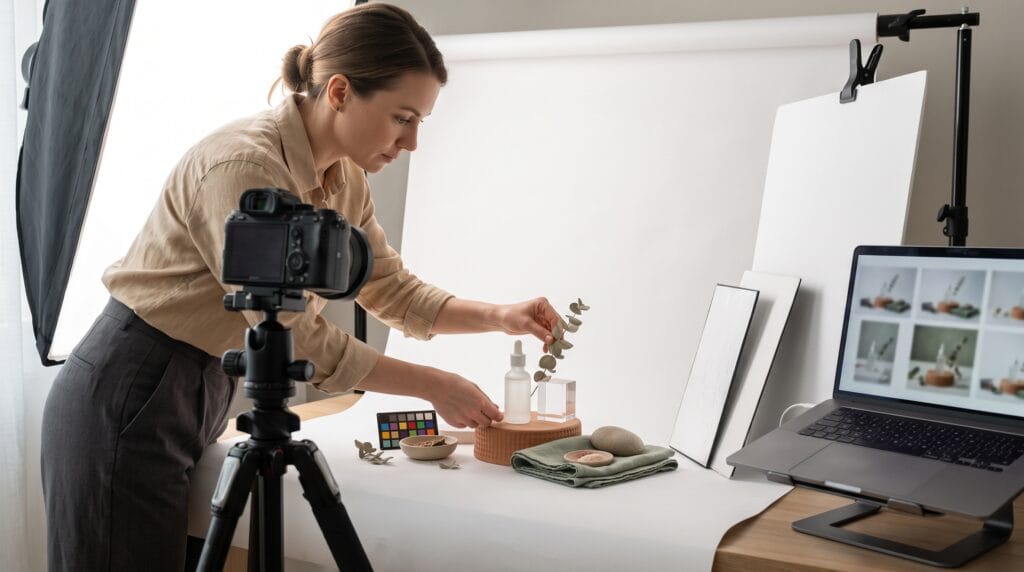
A strong product photography tutorial can help ecommerce businesses create clear, attractive, and professional images without needing an expensive studio. Product photos are often the first thing shoppers notice when browsing an online store, marketplace, or social media page. If the images look dark, blurry, inconsistent, or confusing, customers may leave before reading the product description.
High-quality product photography helps shoppers understand what they are buying. Good images show color, size, texture, shape, and important features. They also make a brand look more trustworthy and professional.
You do not need the most advanced camera or lighting equipment to improve your ecommerce photos. A smartphone, clean background, stable tripod, and reliable light source can produce strong results when used correctly.
This product photography tutorial explains how to plan, photograph, edit, and organize ecommerce images that look consistent and help customers make confident purchasing decisions.
Why Product Photography Matters for Ecommerce
Online shoppers cannot touch, test, or examine a product in person. They rely on images to understand its appearance and quality.
Professional product photography can help businesses:
- Build customer trust
- Show important product details
- Increase perceived value
- Reduce confusion before purchase
- Improve brand consistency
- Support social media marketing
- Make product listings more competitive
- Reduce returns caused by inaccurate expectations
- Improve conversion potential
A customer may compare several similar products before making a decision. The listing with clearer and more useful images often feels more reliable.
Following a practical product photography tutorial helps businesses create photos that are not only beautiful but also informative.
Equipment for a Product Photography Tutorial
You can begin with simple equipment and improve your setup over time.
Camera or Smartphone
Modern smartphones can produce high-quality ecommerce images, especially in good lighting. A digital camera may provide more control over focus, lenses, and manual settings, but it is not required for beginners.
The most important factor is learning how to use the camera you already have.
Before taking photos:
- Clean the camera lens
- Use the highest available image quality
- Turn off unnecessary filters
- Avoid digital zoom
- Enable grid lines
- Use the main rear camera when possible
- Keep the device stable
Digital zoom reduces image quality. Instead, move the camera closer or crop the image during editing.
Tripod
A tripod keeps the camera stable and helps maintain the same framing across multiple products.
Consistent camera placement is especially important for:
- Product catalogs
- Clothing
- Accessories
- Food packaging
- Cosmetics
- Handmade items
- Product variations
A small phone tripod is often enough for a basic home studio.
Background
A white or neutral background makes products easier to see and edit.
Common background options include:
- White poster board
- Foam board
- Paper rolls
- Fabric
- Vinyl backdrops
- Wooden surfaces
- Colored paper
- Acrylic sheets
White backgrounds are widely used for ecommerce because they keep attention on the product. Lifestyle backgrounds can be added later for branding and promotional content.
Lighting
Lighting is one of the most important parts of any product photography tutorial. Soft, even light helps reveal product details while reducing harsh shadows.
You can use:
- Natural window light
- Continuous LED lights
- Softboxes
- Ring lights
- Reflectors
- White foam boards
Natural light is affordable and effective, but it changes throughout the day. Artificial lighting provides more consistency.
Setting Up a Simple Product Photography Studio
A basic studio can be created near a large window or on a table with two lights.
1. Prepare the Product
Clean the product before photographing it. Dust, fingerprints, loose threads, scratches, and packaging damage can become highly visible in close-up images.
For clothing, steam or iron wrinkles. For food packaging, make sure labels face the camera. For jewelry, remove fingerprints and position clasps neatly.
Preparing the product before shooting saves editing time later.
2. Position the Background
Place a white board or paper behind the product. Curve the background gently where the vertical and horizontal surfaces meet.
This curved setup is often called a seamless background because it removes visible corners and creates a clean appearance.
3. Add the Main Light
Place the primary light at a 45-degree angle from the product. If you are using window light, position the table close to the window without placing the product in harsh direct sunlight.
Direct sunlight can create strong shadows and overexposed areas. A thin curtain can soften the light.
4. Use a Reflector
Place a white foam board on the opposite side of the main light. It will reflect light back onto the product and reduce dark shadows.
This simple setup can significantly improve product clarity.
5. Stabilize the Camera
Mount the camera or smartphone on a tripod. Keep the lens level with the product unless you intentionally want a top-down angle.
Once the framing looks correct, avoid moving the tripod between similar products.
Product Photography Tutorial for Camera Settings
The best settings depend on your camera, lighting, and product size. However, several general guidelines can improve image quality.
Use a Low ISO
ISO controls the camera’s sensitivity to light. A high ISO can create visible grain or noise.
Use ISO 100 or 200 when there is enough light. Increase it only when necessary.
Choose the Right Aperture
Aperture controls how much of the image appears sharp.
For many ecommerce products, an aperture around f/8 to f/11 can provide good overall sharpness. A wider aperture, such as f/2.8, creates a blurred background but may leave part of the product out of focus.
For standard product listings, keep most of the product sharp.
Adjust Shutter Speed
When the camera is mounted on a tripod, you can use a slower shutter speed without creating motion blur.
If shooting handheld, use a faster shutter speed to reduce camera shake.
Set White Balance
White balance affects color accuracy. Incorrect white balance can make white products look blue, yellow, or gray.
Use a preset that matches the light source, such as daylight or LED, or set a custom white balance.
Color accuracy is essential because customers expect the product they receive to match the listing images.
Also Read: How To Photoshop On IPhone For Stunning Social Media Photos
Product Photography Composition Tips
Composition determines how the product is positioned inside the image.
Center the Product
For main listing images, place the product near the center with enough space around it. Avoid cropping important features.
Consistent spacing makes a product catalog look organized and professional.
Use the Grid
Camera grid lines can help align products. Make sure vertical packaging, bottles, furniture, and accessories do not appear tilted.
Fill the Frame Carefully
The product should be large enough to see clearly without touching the edges of the image.
Many ecommerce platforms display thumbnails, so small products may be difficult to recognize if they occupy only a small part of the frame.
Photograph Multiple Angles
One image is rarely enough. Customers want to see the product from different perspectives.
Capture:
- Front view
- Back view
- Side views
- Top view
- Close-up details
- Packaging
- Product in use
- Scale reference
- Important features
- Color variations
A complete set of photos can answer customer questions before they contact support.
Product Photography Tutorial for Different Image Types
Ecommerce businesses often need several types of product images.
Main Product Images
The main image should clearly show the product with minimal distractions. A white background is common because it works well across online stores and marketplaces.
The product should be well-lit, centered, and easy to recognize.
Detail Images
Detail photographs show texture, materials, stitching, buttons, labels, controls, or craftsmanship.
These images are especially useful for jewelry, clothing, furniture, handmade goods, and electronics.
Lifestyle Images
Lifestyle images show the product in a realistic environment.
For example:
- A lamp placed in a living room
- A watch worn on a wrist
- A notebook used on a desk
- Skincare products arranged in a bathroom
- Coffee packaging displayed in a kitchen
Lifestyle images help customers imagine how the product fits into their lives.
Scale Images
Customers may misunderstand product dimensions even when measurements are listed.
Show the product next to a familiar object or being used by a person. This gives shoppers a clearer sense of size.
Packaging Images
Packaging can influence the buying decision, especially for gifts, luxury products, subscription boxes, and handmade products.
Show the box, wrapping, inserts, and included accessories.
Lighting Tips for Better Ecommerce Images
Lighting should reveal the product without changing its true appearance.
Avoid Mixing Light Sources
Using daylight and warm indoor lights together can create inconsistent color.
Turn off unnecessary room lights when using window light. If using artificial lights, choose bulbs with the same color temperature.
Diffuse Harsh Light
A diffuser spreads light and creates softer shadows.
You can use:
- Softbox fabric
- A thin white curtain
- Diffusion paper
- A translucent panel
Do not place materials too close to hot bulbs.
Watch Reflections
Glossy packaging, glass, metal, and jewelry can reflect the camera, lights, or surrounding room.
Move the lights slightly to the side and use larger diffusers. Black or white boards can also help control reflections.
Check Shadows
Some shadows make products look realistic, but overly dark shadows can hide details.
Use a reflector or additional fill light to soften them.
Good lighting is a central part of every successful product photography tutorial because even an expensive camera cannot correct poor illumination.
Smartphone Product Photography Tutorial
A smartphone is a practical choice for small businesses and beginner sellers.
Use the Main Lens
The main rear camera usually provides better image quality than the front camera or additional digital zoom lenses.
Tap to Focus
Tap the product on the screen before taking the photo. Confirm that important details appear sharp.
Adjust Exposure
Most smartphones allow you to brighten or darken the image by moving an exposure slider.
Avoid making white backgrounds so bright that product details disappear.
Use a Timer
A two-second or three-second timer reduces movement caused by pressing the shutter button.
Avoid Portrait Mode for Main Images
Portrait mode may blur parts of the product incorrectly. Use the standard photo mode for clean ecommerce images.
Smartphone cameras work best when paired with stable positioning and strong lighting.
Also Read: Simple Photo Editing Tutorial for Clean and Aesthetic Photos
Editing Product Photography for Ecommerce
Editing should improve accuracy and consistency without making the product misleading.
Crop and Straighten
Use the same aspect ratio for all product images. Straighten vertical and horizontal lines.
Consistent cropping makes the online store look professional.
Correct Brightness and Contrast
Adjust exposure so the product is clear, but avoid removing all shadows and texture.
Too much contrast can make dark areas lose detail.
Adjust White Balance
Correct color casts so whites look neutral and product colors remain accurate.
Remove Small Distractions
You may remove dust, background marks, or minor temporary imperfections.
Do not edit the product so heavily that it looks different from what customers will receive.
Sharpen Carefully
A small amount of sharpening can improve detail. Too much sharpening creates unnatural edges and visible artifacts.
Export for the Web
Large image files can slow down an ecommerce website.
Export images in a suitable format such as JPEG or WebP. Use enough resolution for zooming while compressing the file to improve loading speed.
Maintaining Consistency Across Product Images
Consistency helps customers browse products and compare options.
Create a photography style guide that defines:
- Background color
- Image ratio
- Camera angle
- Product scale
- Lighting direction
- Shadow style
- Cropping
- Editing settings
- File naming
- Export dimensions
Photograph similar products using the same setup. Mark the tripod and table positions so they can be recreated later.
This is especially useful when adding new products months after the original photos were taken.
A consistent product photography tutorial workflow saves time and strengthens brand identity.
Common Product Photography Mistakes
Several common mistakes can reduce image quality.
1. Using Insufficient Light
Dark images create noise and hide details. Add more light rather than relying on heavy editing.
2. Using a Busy Background
Clutter distracts from the product. Keep the main listing image simple.
3. Incorrect Color
Inaccurate color can lead to customer disappointment and returns. Check white balance and compare the image with the real product.
4. Inconsistent Angles
Random angles and framing make a product catalog look unorganized.
5. Overediting
Excessive smoothing, saturation, or background removal can create unrealistic images.
6. Showing Too Few Images
One photo may leave customers with unanswered questions. Include enough images to explain the product fully.
7. Ignoring Mobile Display
Many shoppers browse on phones. Review images at thumbnail size to make sure the product remains visible.
Product Photography Workflow for Ecommerce Businesses
A repeatable workflow helps you photograph products efficiently.
Use this process:
- Prepare and clean all products.
- Group products by size or category.
- Set up the background and lighting.
- Position the tripod.
- Take a test photo.
- Check focus, exposure, and color.
- Photograph all required angles.
- Capture detail and lifestyle images.
- Back up the files.
- Edit using consistent settings.
- Export web-ready versions.
- Name and organize the final files.
Create a shot list before starting. This prevents missing important angles and reduces the need to rebuild the setup.
Also Read: Photoshop Poster Effects Tutorial for Better Designs
Final Thoughts on Product Photography Tutorial
A professional ecommerce image does not always require expensive equipment. Clear lighting, stable camera placement, thoughtful composition, accurate colors, and consistent editing often make the biggest difference.
This product photography tutorial can help small businesses, online sellers, and creative entrepreneurs improve product listings with a simple home setup. Begin with one camera or smartphone, one reliable light source, a clean background, and a tripod.
Photograph every product from multiple useful angles. Include close-ups, lifestyle scenes, scale references, and packaging when they help customers understand the item.
Most importantly, keep your images honest. Product photography should make an item look its best while still representing what the buyer will actually receive.
By applying this product photography tutorial consistently, you can create better ecommerce images, improve customer confidence, strengthen your visual brand, and build a more professional online shopping experience.
For high-quality fonts to boost your income, check out Letter Crafted. Our professional fonts are perfect for branding, marketing, and content creation. So, don’t miss this opportunity.