
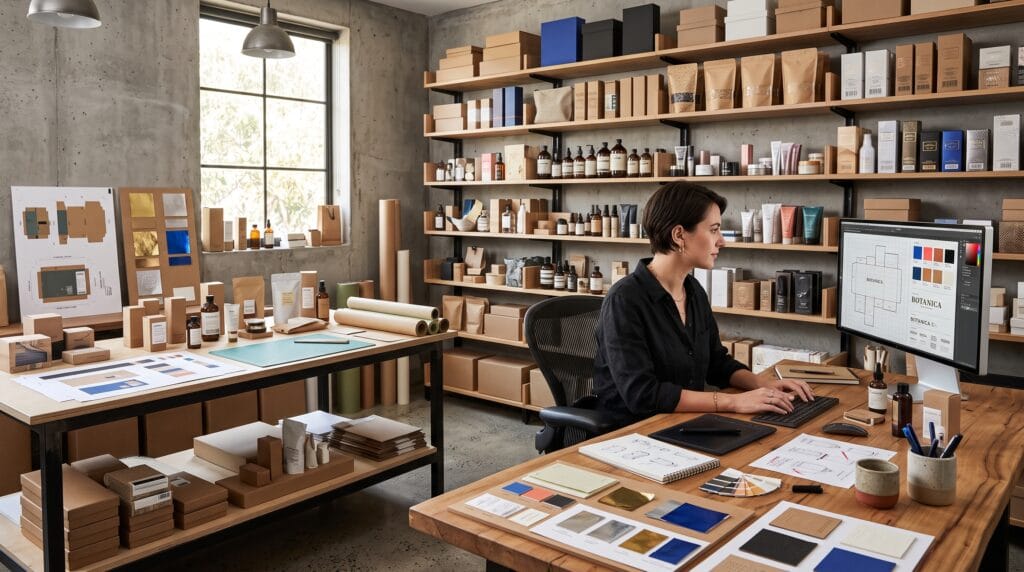
Professional packaging must do more than look attractive. It has to protect the product, communicate essential information, support the brand, fit production requirements, survive shipping, and help customers make a confident purchase. This packaging design tutorial explains how to move from an early idea to a production-ready package without overlooking the practical details that often cause expensive mistakes.
Packaging design combines branding, typography, color, structure, materials, printing, regulation, and customer experience. A beautiful layout can fail if the barcode does not scan, the text becomes unreadable after folding, the box collapses during shipping, or the artwork uses the wrong color mode.
The best packaging process begins with strategy and technical requirements before visual styling. Designers need to understand the product, audience, retail environment, materials, dimensions, printer specifications, and legal content. Only then should they develop concepts, build a dieline, create artwork, prepare mockups, test prototypes, and finalize production files.
This step-by-step packaging design tutorial is suitable for beginners, freelancers, brand owners, and design students. It covers research, structural planning, visual hierarchy, typography, color, sustainability, mockups, preflight, supplier communication, and final quality assurance.
What Is Packaging Design?
Packaging design is the process of creating the structure, graphics, information, and physical experience surrounding a product.
It may include:
- Primary packaging that directly contains the product
- Secondary packaging such as cartons or sleeves
- Shipping packaging
- Labels
- Inserts
- Seals
- Instruction cards
- Retail displays
- Multipacks
- Gift boxes
Good packaging balances three responsibilities:
- Protect the product
- Communicate clearly
- Create a memorable brand experience
A package should be attractive, but it must also work in the real world.
1. Understand the Product
Before opening design software, gather complete product information.
Product Questions
Ask:
- What is the product?
- What are its dimensions?
- How much does it weigh?
- Is it fragile?
- Does it need protection from light, air, moisture, or heat?
- Is it liquid, powder, solid, or perishable?
- How will customers use it?
- How will it be stored?
- How will it be shipped?
- Does it need tamper evidence?
- Does it require a seal or closure?
Packaging Environment
Consider whether the product will be sold:
- On a retail shelf
- In a display unit
- Through ecommerce
- In a refrigerator
- Outdoors
- In a pharmacy
- In a luxury boutique
- At events
- Through subscription delivery
The environment affects material, structure, readability, durability, and visual impact.
2. Define the Target Audience
Professional packaging should be designed for a specific buyer.
Create a simple audience profile covering:
- Age range
- Location
- Lifestyle
- Needs
- Buying motivation
- Price sensitivity
- Visual preferences
- Sustainability expectations
- Shopping behavior
Example
A premium skincare package for gift buyers may require refined typography, tactile materials, and elegant unboxing. A value-focused household product may need bold hierarchy, quick readability, and efficient production.
Audience clarity prevents the design from becoming a collection of personal preferences.
3. Study the Market and Competitors
Review competing products before creating concepts.
What to Analyze
Look at:
- Package structures
- Color patterns
- Typography
- Claims
- Materials
- Photography
- Illustration
- Price positioning
- Shelf presence
- Information hierarchy
Build a Competitive Audit
Create a table with columns for:
- Brand
- Product
- Audience
- Visual style
- Main message
- Strength
- Weakness
- Opportunity
The goal is not to copy competitors. It is to understand the category and find a credible way to stand apart.
4. Write a Packaging Design Brief
A strong brief gives the project direction.
Packaging Brief Template
Include:
- Brand background
- Product description
- Target audience
- Business objective
- Key message
- Required content
- Package type
- Dimensions
- Material
- Printing method
- Budget
- Timeline
- Competitors
- Deliverables
- Approval process
Define Success
Possible success criteria include:
- Better shelf visibility
- Easier product selection
- Stronger premium perception
- Lower packaging cost
- Reduced material use
- Improved shipping protection
- Higher gift appeal
- More consistent brand recognition
A clear brief makes the remaining packaging design tutorial steps faster and more objective.
5. Choose the Packaging Structure
The structure determines how the package opens, closes, protects, stacks, ships, and displays.
Common Packaging Formats
- Folding carton
- Rigid box
- Mailer box
- Sleeve
- Pouch
- Bottle label
- Jar label
- Tube
- Sachet
- Clamshell
- Wrap
- Tray
- Hanging card
Structural Questions
Ask:
- Is the product easy to insert?
- Can customers open it safely?
- Can it be resealed?
- Does it stand correctly?
- Can it stack?
- Does it waste space?
- Can it be produced efficiently?
- Is it suitable for shipping?
- Is the material easy to recycle?
For complex structures, work with a packaging engineer or supplier.
6. Obtain or Create a Dieline
A dieline is the flat technical template used to create a package.
It shows:
- Cut lines
- Fold lines
- Glue areas
- Bleed
- Safe areas
- Perforations
- Windows
- Dimensions
- Panel boundaries
Best Practice
Ask the printer or manufacturer for the approved dieline whenever possible.
A supplier-generated dieline is safer because it reflects:
- Machine tolerances
- Material thickness
- Folding behavior
- Glue requirements
- Production standards
Dieline Layers
Organize the file with separate layers for:
- Artwork
- Dieline
- Notes
- White ink
- Varnish
- Foil
- Embossing
- Spot colors
Never place the dieline on the same printable artwork layer unless the supplier requests it.
7. Plan the Information Hierarchy
Customers should understand the package quickly.
Typical Front Panel Hierarchy
- Brand name
- Product name
- Product type
- Main benefit
- Variant
- Quantity
- Supporting claim
Side and Back Panels
These may include:
- Description
- Instructions
- Ingredients
- Warnings
- Nutrition
- Certifications
- Manufacturer details
- Website
- Barcode
- Recycling information
- Legal statements
The most important information should remain visible at normal viewing distance.
8. Build the Layout Grid
A grid creates consistency across panels and product variations.
Use the Grid to Control
- Margins
- Alignment
- Spacing
- Text blocks
- Image placement
- Logo position
- Product-family consistency
- Barcode area
- Regulatory zones
Respect Folds and Edges
Avoid placing small text, logos, or faces directly on:
- Fold lines
- Curved surfaces
- Seams
- Glue flaps
- Cut edges
- Crimped areas
A layout that looks perfect when flat may distort when assembled.
9. Choose Packaging Typography
Typography affects readability, personality, and perceived quality.
Recommended Typeface Roles
- Display typeface for product name
- Brand typeface for identity
- Highly readable typeface for details
- Monospaced or technical style when appropriate for codes or specifications
Typography Best Practices
- Limit the number of typefaces.
- Use clear contrast between heading levels.
- Keep body copy readable.
- Avoid excessive letter spacing in long text.
- Test small type at actual size.
- Check curved surfaces and narrow panels.
- Maintain consistent capitalization.
- Use correct symbols and units.
Also Read: 30+ Unique, Contemporary, and Futuristic Candy Packaging Ideas
10. Develop the Color System
Color helps customers recognize the brand, identify variants, and understand positioning.
Color Decisions Should Consider
- Brand identity
- Audience
- Category expectations
- Product flavor or variant
- Shelf environment
- Print method
- Material color
- Accessibility
- Ink limitations
Use Color for Product Families
A master system can use one stable brand base with a controlled color change for each variant.
For example:
- Blue for original
- Green for herbal
- Orange for citrus
- Purple for lavender
Do not rely only on color to communicate important differences. Include text or symbols for accessibility.
Also Read: Luxury Packaging Design for Better Marketing Results
11. Select Images and Illustration
Packaging imagery should support the message rather than decorate empty space.
Image Options
- Product photography
- Ingredient photography
- Lifestyle photography
- Illustration
- Pattern
- Icon system
- Abstract graphic
- Technical diagram
Production Requirements
Check:
- Resolution
- Color mode
- Licensing
- Cropping
- Contrast
- Retouching
- Print size
- Background removal
- Special ink requirements
Avoid using low-resolution images or unlicensed assets.
12. Choose Materials and Finishes
Materials affect cost, protection, sustainability, texture, and brand perception.
Common Materials
- Paperboard
- Corrugated board
- Kraft paper
- Molded pulp
- Glass
- Aluminum
- Plastic
- Flexible film
- Fabric
- Wood
- Compostable materials
Common Finishes
- Matte lamination
- Gloss lamination
- Soft-touch coating
- Spot varnish
- Foil stamping
- Embossing
- Debossing
- Metallic ink
- White ink
- Texture coating
- Die-cut windows
Match Finish to Strategy
A premium finish should support the brand and product rather than add cost without purpose.
13. Design for Sustainability
Sustainable packaging should reduce real environmental impact.
Practical Strategies
- Reduce material
- Avoid unnecessary layers
- Use recyclable structures
- Prefer mono-material solutions where practical
- Increase recycled content
- Improve shipping efficiency
- Design for reuse
- Make disposal instructions clear
- Avoid oversized boxes
- Reduce heavy decorative finishes
Avoid Greenwashing
Do not use claims such as “eco-friendly,” “green,” or “sustainable” without evidence.
Document:
- Material source
- Recycled content
- Certification
- Disposal method
- Reusability
- Measured reduction
14. Create the Artwork
Build artwork directly on the approved dieline.
File Organization
Use a clear layer structure:
- Dieline
- Background
- Images
- Typography
- Legal content
- Barcode
- Finishes
- Notes
Use Paragraph and Character Styles
Styles reduce inconsistency across:
- Product names
- Descriptions
- Ingredients
- Instructions
- Warnings
- Variant labels
Maintain a Content Checklist
Confirm every required content item before finalizing the layout.
15. Add Barcodes and Required Symbols
Barcodes and regulatory symbols are functional elements.
Barcode Best Practices
- Use the correct code type.
- Maintain required quiet zones.
- Avoid placing it on folds or curves.
- Use strong contrast.
- Do not distort proportions.
- Test at actual size.
- Confirm the number.
Common Packaging Symbols
Depending on the product and market, packaging may need:
- Recycling marks
- Material codes
- Food-safe symbols
- Hazard symbols
- Certification marks
- Country-of-origin information
- Disposal instructions
- Age restrictions
Confirm all requirements with qualified legal, regulatory, and production specialists.
16. Prepare Packaging Mockups
Mockups help teams understand how flat artwork will look on a real package.
Mockup Types
- Digital 3D mockup
- Photo-realistic template
- Printed paper prototype
- White structural sample
- Production proof
Use Mockups to Review
- Front-panel impact
- Side-panel readability
- Distortion
- Scale
- Shelf presence
- Unboxing
- Product-family consistency
Also Read: Packaging Design Mockup Templates That Look Professional
17. Print a Physical Prototype
A physical prototype reveals problems that screens cannot show.
Review the Prototype for
- Folding accuracy
- Panel alignment
- Opening experience
- Product fit
- Text size
- Color
- Image quality
- Closure
- Glue areas
- Barcode scanning
- Shipping durability
Print the prototype at 100 percent scale.
Do not approve a package only from a zoomed-in monitor view.
18. Conduct a Shelf and Ecommerce Test
Packaging may appear very different in a store compared with a design presentation.
Shelf Test
Place the prototype beside competitors and check:
- Recognition
- Contrast
- Readability
- Differentiation
- Product type
- Price positioning
Ecommerce Test
Create product thumbnails and listing images.
Check whether customers can understand:
- Brand
- Product
- Variant
- Size
- Benefit
Small thumbnails require stronger hierarchy than large retail displays.
19. Prepare Print-Ready Files
The printer should provide exact production specifications.
Common Preflight Requirements
- CMYK or approved spot colors
- Correct bleed
- Embedded or outlined fonts
- High-resolution images
- Linked files included
- Correct trim size
- Overprint settings reviewed
- Transparency checked
- Dieline on a nonprinting layer
- Special finishes separated
- Barcode verified
- Rich black used correctly
- Minimum line weight respected
Package the Working Files
Include:
- Final artwork
- Fonts when licensing allows
- Linked images
- Color specifications
- Finish notes
- Readme file
- Approved dieline
- Reference PDF
20. Review Printer Proofs
A proof is the last opportunity to catch problems before full production.
Check
- Text
- Spelling
- Dimensions
- Colors
- Images
- Barcode
- Fold alignment
- Cut position
- Special finishes
- Legal content
Compare the proof with the signed content and production checklist.
Do not approve under deadline pressure without a complete review.
Packaging Design Software Comparison
| Software Type | Best For | Strength | Limitation |
|---|---|---|---|
| Vector design software | Dielines and artwork | Precise paths and print control | Learning curve |
| Layout software | Text-heavy labels and cartons | Strong styles and preflight | Less suitable for complex illustration |
| Photo editing software | Image preparation | Retouching and compositing | Weak for dielines |
| 3D packaging software | Mockups and visualization | Realistic structure preview | May require specialized knowledge |
| Online template tools | Simple concepts | Fast and accessible | Limited production control |
| CAD packaging software | Structural engineering | Accurate construction | Specialist workflow |
Packaging Design Process Summary
A professional workflow follows this sequence:
- Understand the product.
- Define the audience.
- Research competitors.
- Write the brief.
- Select the structure.
- Obtain the dieline.
- Plan hierarchy.
- Build the grid.
- Choose typography.
- Develop color.
- Select imagery.
- Choose materials.
- Address sustainability.
- Create artwork.
- Add barcodes and symbols.
- Create mockups.
- Print prototypes.
- Test shelf and ecommerce views.
- Prepare production files.
- Review proofs.
Common Packaging Design Mistakes
1. Designing Before Confirming Dimensions
Incorrect dimensions can make the entire design unusable.
2. Ignoring the Printer
Production requirements should be confirmed early.
3. Using Too Much Information on the Front
Strong hierarchy is more effective than filling every space.
4. Choosing Style Over Readability
Customers must understand the product quickly.
5. Using Small Text
Always test at actual size.
6. Placing Important Content on Folds
Folds and curves distort artwork.
7. Forgetting Ecommerce
A package should remain recognizable in small product images.
8. Overusing Premium Finishes
More foil, varnish, and embossing do not automatically create better packaging.
9. Making Unsupported Sustainability Claims
Claims need evidence.
10. Skipping a Physical Prototype
Digital mockups cannot reveal every construction problem.
Packaging Design Tutorial Checklist
Use this packaging design tutorial checklist before production:
- Product requirements are documented.
- Audience is clearly defined.
- Competitors have been reviewed.
- Brief and objectives are approved.
- Structure is suitable for the product.
- Printer-approved dieline is used.
- Fold and glue areas are respected.
- Front-panel hierarchy is clear.
- Typography is readable at actual size.
- Color has been tested for print.
- Images are high resolution and licensed.
- Materials support protection and positioning.
- Sustainability claims are supported.
- Barcode scans correctly.
- Legal content is approved.
- Mockups have been reviewed.
- A physical prototype has been tested.
- Ecommerce thumbnails are readable.
- Print files pass preflight.
- Final proof has written approval.
Frequently Asked Questions on Packaging Design Tutorial
1. What Is the First Step in Packaging Design?
The first step is understanding the product, audience, environment, dimensions, protection needs, and production constraints.
2. Do I Need a Dieline?
Yes. A dieline defines the package structure, folds, cuts, glue areas, bleed, and safe zones.
3. Which Software Is Best for Packaging Design?
Vector design and professional page-layout software are commonly used for production artwork. Structural packages may also require CAD or specialized 3D packaging software.
4. How Much Bleed Should Packaging Artwork Have?
The printer determines the exact bleed. A common amount is several millimeters, but designers should never assume the specification.
5. Should Fonts Be Outlined?
Many printers request outlined fonts, while others accept embedded fonts. Confirm the requirement and keep an editable version before outlining.
6. How Do I Make Packaging Look Professional?
Use a clear hierarchy, disciplined typography, consistent spacing, suitable materials, accurate production files, and a tested prototype.
7. Can AI Help With Packaging Design?
AI can support research, concept generation, copy exploration, visual directions, and mockup ideas. Final packaging still requires human judgment, production expertise, legal review, and print testing.
Conclusion on Packaging Design Tutorial
A professional package is the result of strategy, design craft, technical accuracy, and physical testing.
This packaging design tutorial begins with the product and audience, then moves through structure, dielines, hierarchy, typography, color, materials, sustainability, artwork, mockups, prototypes, and production files.
The strongest packaging is not simply attractive. It is easy to understand, practical to manufacture, protective during shipping, consistent with the brand, and useful to the customer.
Before approving any package, print it at actual size, build a prototype, test the barcode, review every panel, and confirm the final specifications with the supplier. Careful preparation protects the budget and creates a better product experience.
For high-quality fonts to boost your income, check out Letter Crafted. Our professional fonts are perfect for branding, marketing, and content creation. So, don’t miss this opportunity.