
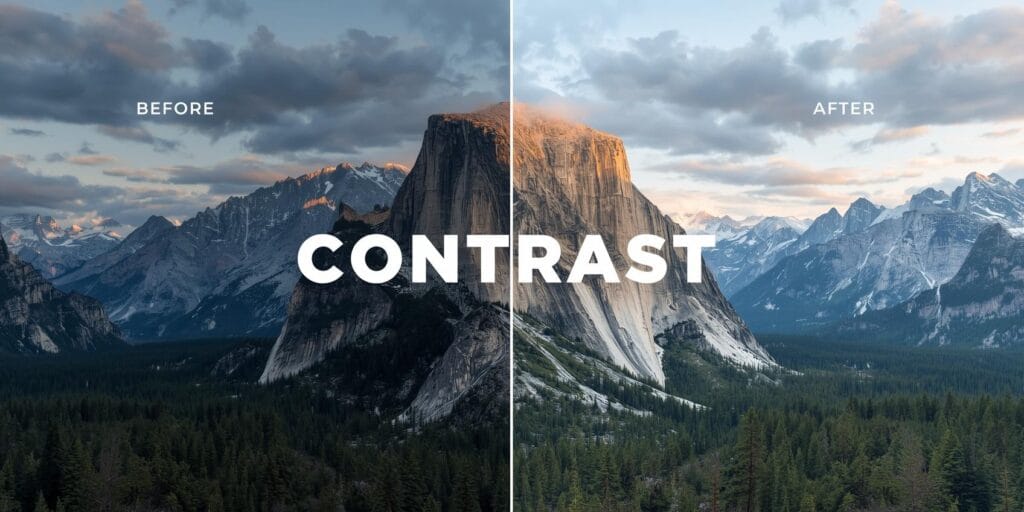
If your photos look flat, hazy, or “almost good,” contrast is usually the missing ingredient. The goal isn’t to crush shadows or blow highlights. The goal is to shape depth so your subject looks clear, your colors feel richer, and your image reads fast. This photoshop tutorial photo editing guide will show you a clean, repeatable way to get better contrast with realistic results.
You’ll learn global contrast (the whole image), local contrast (specific areas), and micro-contrast (detail and texture). By the end, you’ll have a workflow you can use on portraits, travel shots, and product photos. This photoshop tutorial photo editing approach stays non-destructive, so you can always adjust later.
Photoshop Tutorial Photo Editing for Contrast Starts with a Clean Base
Before you touch Curves, build a solid foundation. A lot of “contrast problems” are actually exposure problems.
Photoshop tutorial photo editing base checks
Check exposure: is the image too dark or too bright overall?
white balance: is it too warm/cool, making contrast feel muddy?
highlights: are they clipped?
shadows: are they blocked (pure black with no detail)?
If you fix the base first, your photoshop tutorial photo editing contrast will look more natural and take less effort.
Photoshop Tutorial Photo Editing Using Camera Raw for Quick Contrast
If you want fast results, start in Camera Raw Filter (even for JPEGs).
Step-by-step Camera Raw contrast workflow
Basic panel
Adjust Exposure first (small moves).
Lower Highlights if bright areas look harsh.
Raise Shadows if the image is too heavy.
Add Contrast carefully (small increments).
Presence
Use Texture for crisp detail (great for products).
Clarity for midtone contrast (great for landscapes).
Dehaze lightly if the photo looks foggy or washed.
Pro tip: Too much Clarity can make skin look rough. For portraits, keep it subtle or apply it locally. This is a key habit in photoshop tutorial photo editing for better contrast.
Photoshop Tutorial Photo Editing with Curves for The Best Contrast Control
Curves is the most powerful tool for contrast because it lets you control shadows, midtones, and highlights separately.
1. Basic Curves setup
Add a Curves Adjustment Layer.
Make a gentle S-curve:
Pull down slightly in the shadow area.
Lift slightly in the highlight area.
That’s classic contrast. But for clean, modern images, keep it subtle. In this photoshop tutorial photo editing workflow, the best curve is often the smallest curve.
2. Curves tip for “flat” photos
If the photo feels gray, you may need to:
deepen blacks slightly (bottom-left)
lift highlights slightly (top-right)
keep midtones controlled
Photoshop Tutorial Photo Editing with Levels for Fast Black and White Points
Levels is the quick “cleanup” tool. It’s perfect when you just need stronger endpoints.
Levels workflow
Add a Levels Adjustment Layer.
Move the black point slider right until blacks look solid.
Move the white point slider left until whites feel bright.
Adjust the middle slider (midtone) only if needed.
If you’re doing photoshop tutorial photo editing for product photos, Levels is often enough to make whites look cleaner and products look sharper.
Also Read: How To Photoshop On IPhone For Stunning Social Media Photos
Photoshop Tutorial Photo Editing for Local Contrast Using Masks
Global contrast can make the whole image punchier, but it can also make shadows too heavy or skin too harsh. Local contrast fixes that.
Local contrast method (simple and clean)
Add a Curves Adjustment Layer and increase contrast slightly.
Invert the mask (Ctrl/Cmd + I) to hide the effect.
Paint with a soft white brush on the mask where you want more contrast:
eyes, eyebrows, hair edges (portraits)
main subject and foreground (travel)
product edges and label text (product photos)
This is the “pro” part of photoshop tutorial photo editing. You control where contrast lives, not just how strong it is.
Photoshop Tutorial Photo Editing for Micro-Contrast and Detail
Micro-contrast makes textures pop without changing overall brightness too much. Use it for fabric, architecture, food, and product details.
1. Camera Raw micro-contrast approach
Texture: increases detail without heavy halos.
Clarity: increases midtone contrast, but can look crunchy.
Use them lightly, then mask if needed.
2. High Pass sharpening for controlled detail
Duplicate your layer (Ctrl/Cmd + J).
Go to Filter → Other → High Pass.
Set blending mode to Overlay or Soft Light.
Add a mask and apply only where you want extra crispness.
In photoshop tutorial photo editing, micro-contrast is powerful, but it should feel invisible. If people notice the effect, it’s usually too much.
Photoshop Tutorial Photo Editing for Contrast in Portraits without Harsh Skin
Portrait contrast is tricky because skin can look rough fast.
Portrait-safe contrast tips
Use Curves, but keep the S-curve gentle.
Add contrast mainly to:
eyes, brows, lips, hair
clothing edges
background separation (not the face texture)
Avoid heavy Clarity on skin. If you need “pop,” use it on eyes and hair only.
A clean portrait is a great test of your photoshop tutorial photo editing skills. If skin looks natural and the photo still has depth, you did it right.
Photoshop Tutorial Photo Editing for Product Photos with Clean Contrast
Product contrast should feel crisp and commercial, not dramatic.
1. Product contrast checklist
whites look clean (not gray)
shadows exist, but don’t swallow detail
label text is readable
edges feel sharp without halos
2. Quick product workflow
Levels to set clean black/white points.
Curves for midtone control.
Local mask to boost the product, not the background.
Subtle sharpening on product edges only.
This photoshop tutorial photo editing routine works well for e-commerce and marketplace listing images.
Also Read: Editing Made Easy: How to Use Content Aware Fill in Photoshop
Photoshop Tutorial Photo Editing to Avoid “Crushed Blacks” and “Blown Highlights”
Bad contrast usually looks like:
pure black shadows with no detail
bright areas that lose texture
crunchy outlines (halos)
skin that looks over-sharpened
1. Fix crushed blacks
lift the shadow point slightly in Curves
raise Shadows in Camera Raw
reduce the black point in Levels
2. Fix blown highlights
lower Highlights in Camera Raw
pull down the highlight area in Curves
reduce whites slightly
In photoshop tutorial photo editing, the best contrast keeps detail on both ends.
Photoshop Tutorial Photo Editing with Dodge and Burn for Depth
Dodge and burn is the secret sauce for realistic depth. Instead of increasing global contrast, you shape light.
Simple dodge and burn setup
Create a new layer filled with 50% gray.
Set blending mode to Soft Light.
Paint with a low-opacity brush:
white to dodge (brighten)
black to burn (darken)
Use it to:
brighten the subject’s face slightly
deepen shadows under objects
create subtle separation between subject and background
This technique makes photoshop tutorial photo editing contrast feel natural, not “filter-like.”
Photo Editing Workflow in Photoshop You Can Repeat Every Time
Here’s a repeatable order that works for most photos:
Camera Raw base (exposure, highlights, shadows)
Curves for global contrast
Levels if endpoints need cleanup
Local contrast with masks
Micro-contrast (texture/sharpening)
Dodge and burn (optional)
Final check: zoom out and reduce strength if needed
Keep this workflow saved as a mental checklist. This is how photoshop tutorial photo editing becomes consistent across a full album.
Photo Editing Final Checks Before Exporting
Before you export, do these quick checks:
view at 100% zoom (look for halos and noise)
view zoomed out (does it feel too dark?)
check skin (if portrait) for harsh texture
shadows for lost detail
highlights for blown areas
Export tips:
for web: JPEG, sRGB, moderate quality
for print: high-res, correct color space, keep layers if needed
This last step is part of professional photoshop tutorial photo editing. The edit should look good everywhere, not only in your workspace.
Also Read: Adobe Lightroom vs Photoshop: The Ultimate Comparison for Designers and Editors
Final Thoughts
Better contrast is less about pushing sliders and more about control. Use Camera Raw to set a clean base, Curves to shape depth, and masks to apply contrast only where it helps. With practice, your photoshop tutorial photo editing results will look sharper, richer, and more intentional without looking over-edited. And you can use photoshop keyboard shortcuts for faster work, your workflow smoother and more efficient.
For high-quality fonts to boost your income, check out Letter Crafted. Our professional fonts are perfect for branding, marketing, and content creation. So, don’t miss this opportunity.