
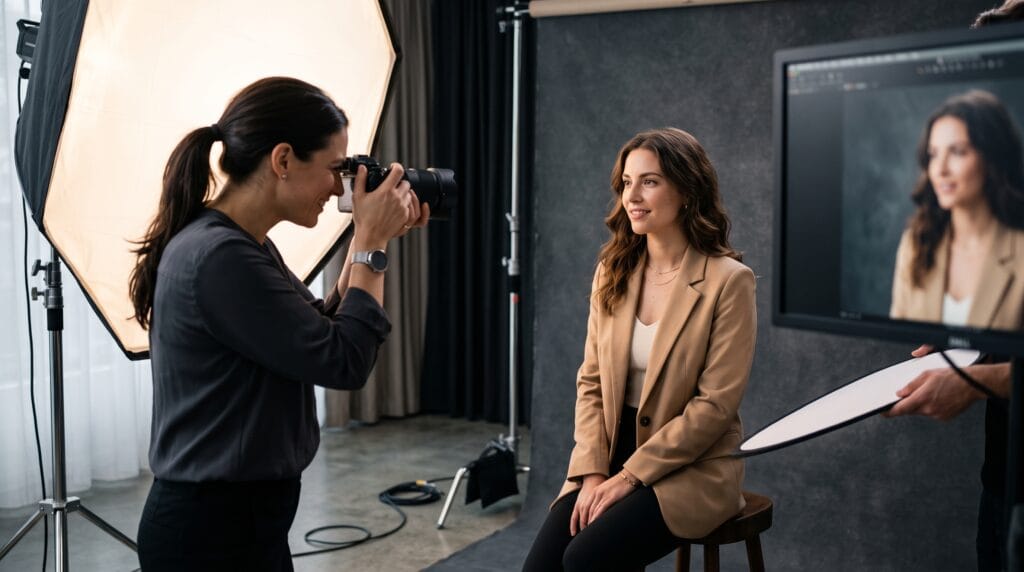
A good portrait photography tutorial should teach more than camera settings. Professional portraits depend on lighting, composition, posing, background control, lens choice, communication, and the photographer’s ability to make a subject feel comfortable. When these elements work together, even a simple location can produce striking portraits with personality and visual impact.
Portrait photography is also one of the best genres for developing your overall photography skills. It teaches you how to observe light, direct people, control depth of field, and make creative decisions quickly. Whether you photograph clients, friends, families, models, or personal projects, mastering a few core techniques can dramatically improve your results.
This guide walks through the entire process from preparation to final editing.
Portrait Photography Tutorial – Start With a Clear Idea
Before adjusting your camera, decide what kind of portrait you want to create.
A professional headshot requires a different approach from an environmental portrait, fashion image, lifestyle photo, or dramatic studio photograph.
Think about the mood before the session begins.
Do you want the image to feel soft and approachable? Dramatic and cinematic? Bright and commercial? Natural and relaxed?
Your creative direction influences every later decision, including location, lighting, clothing, background, lens choice, posing, and editing.
Creating a simple mood board can help. Collect a few reference images that represent the lighting, colors, poses, and overall atmosphere you want.
The goal is not to copy another photographer. References simply help turn a vague idea into a clearer visual plan.
Choose the Right Camera for Portrait Photography
You do not need the most expensive camera to create professional portraits.
Modern mirrorless and DSLR cameras can produce excellent results when paired with good technique and suitable lenses.
Even cameras with smaller sensors can create beautiful portraits if lighting and composition are handled carefully.
More important features include accurate autofocus, reliable eye detection, good image quality at moderate ISO settings, and controls that allow you to adjust exposure quickly.
A useful portrait photography tutorial should emphasize technique over equipment. Better equipment can make certain situations easier, but it cannot replace good light, thoughtful composition, or strong communication with your subject.
Portrait Photography Tutorial for Choosing the Best Lens
Lens choice significantly affects the appearance of a portrait.
Different focal lengths change perspective, background compression, working distance, and how much of the environment appears in the frame.
50mm for Versatile Portraits
A 50mm lens is a popular starting point because it can handle head-and-shoulder portraits, half-body images, and environmental compositions.
On a full-frame camera, 50mm provides a relatively natural perspective while still allowing some background separation at wider apertures.
It is also often more affordable than specialized portrait lenses.
85mm for Classic Professional Portraits
An 85mm lens is a favorite among portrait photographers.
The longer focal length creates flattering perspective and allows photographers to keep some distance between the camera and subject.
When used with a wide aperture, it can also produce attractive background blur.
Longer Lenses for Background Compression
Lenses around 105mm, 135mm, or longer can produce strong background compression.
This makes distant background elements appear visually closer and can create a polished portrait style.
The trade-off is that you need more physical space between yourself and the subject.
Best Camera Settings in a Portrait Photography Tutorial
Camera settings should support your creative goal rather than follow one fixed formula.
However, a few starting points work well in many situations.
Aperture
Wide apertures such as f/1.8, f/2, or f/2.8 create shallow depth of field and strong background separation.
However, extremely wide apertures can make focusing more difficult, particularly when photographing more than one person.
For individual portraits, you might start around f/2 to f/2.8. For groups, consider f/4, f/5.6, or narrower depending on how people are positioned.
Shutter Speed
Use a shutter speed fast enough to avoid motion blur.
For relatively still portraits, 1/200 second can be a practical starting point.
If the subject is walking, turning, or moving naturally, increase the shutter speed.
ISO
Keep ISO as low as practical while maintaining the aperture and shutter speed you need.
Modern cameras often handle higher ISO values well, so do not sacrifice sharpness simply to keep ISO at its minimum value.
A slightly noisy sharp portrait is usually better than a clean but blurry photograph.
Focus on the Eyes for Stronger Portraits
The eyes naturally attract attention in a portrait.
When photographing a person with a shallow depth of field, prioritize accurate focus on the eye closest to the camera.
Modern eye-detection autofocus can make this process much easier.
If your camera does not provide reliable eye autofocus, use a single focus point and position it carefully over the eye.
Always review sharpness during the session, especially when working at very wide apertures.
One of the most important lessons in any portrait photography tutorial is that attractive background blur means little if the subject’s eyes are noticeably out of focus.
Also Read: Photoshop Editing Tutorial Step by Step for Better Results
Portrait Photography Lighting Tutorial for Natural Results
Lighting can completely transform the mood and quality of a portrait.
You do not need complicated studio equipment to create flattering light.
Understanding natural light is one of the best places to begin.
Use Window Light Indoors
A large window can behave like a giant softbox.
Position the subject near the window and observe how the light falls across the face.
Turning the subject slightly away from the window can create subtle shadows that add dimension.
Avoid placing the subject directly in harsh sunlight coming through the window unless you intentionally want a dramatic effect.
Photograph During Golden Hour
Outdoor portraits often look beautiful during the period shortly after sunrise or before sunset.
The sun is lower in the sky, which generally produces softer, warmer light than midday sun.
You can place the sun behind your subject to create backlighting or position it slightly to the side for more directional light.
Look for Open Shade
Open shade is one of the easiest lighting situations for portraits.
Place the subject beneath a covered area, beside a building, or under another source of shade while keeping them facing toward an open area of sky.
This can produce soft, flattering illumination without the harsh shadows created by direct sunlight.
Portrait Photography Tutorial for Flash and Studio Lighting
Once you understand natural light, adding flash gives you greater control.
A single off-camera flash with a large modifier can create highly professional results.
Place the light approximately 45 degrees to one side of the subject and slightly above eye level.
This creates dimensional light while keeping the setup relatively simple.
Move the light closer for softer illumination and farther away for a harder effect.
You can also use a reflector on the opposite side to reduce shadows.
Do not rush into complicated multi-light setups. Learning how to control one light effectively will teach you more than adding several flashes without understanding what each one contributes.
Portrait Photography Tutorial for Professional Posing
Many people become uncomfortable as soon as a camera is pointed toward them.
Good portrait photography therefore requires communication as much as technical skill.
Avoid giving vague instructions such as “just act natural.”
Instead, provide specific and easy directions.
Ask the person to shift weight onto one leg, turn their shoulders slightly, move their chin forward, or look toward a specific location.
Small adjustments often make a significant visual difference.
Give the Hands Something to Do
Hands can quickly make a pose appear awkward.
Instead of leaving them hanging without purpose, ask the subject to lightly touch clothing, hold an object, place a hand in a pocket, adjust jewelry, or interact naturally with the environment.
Keep fingers relaxed.
Avoid Completely Square Shoulders
Positioning both shoulders directly toward the camera can sometimes make a portrait look rigid.
Turning the body slightly while keeping the face connected to the camera often creates a more dynamic pose.
However, posing rules are not absolute. Fashion, editorial, and conceptual portraits may deliberately use symmetrical or straight-on poses.
Use Movement to Create Natural Portraits
Not every photograph needs a fixed pose.
Movement can help people forget about the camera and create more natural expressions.
Ask your subject to walk slowly toward you, look over their shoulder, adjust their jacket, turn around, laugh, or move their hair.
Shoot several frames during the movement rather than waiting for one perfect position.
This technique is especially useful for lifestyle and outdoor photography.
Movement also creates variations quickly, giving clients a broader range of images without requiring dozens of completely different posing setups.
Portrait Photography Composition Tutorial
Composition guides the viewer toward your subject.
Start with simple techniques before experimenting with more unusual framing.
Use the Rule of Thirds
Positioning the eyes or face near one of the rule-of-thirds intersections can create a balanced composition.
This works particularly well when the background contains meaningful visual information.
Use Negative Space
Leaving empty space around the subject can make a portrait feel cleaner and more intentional.
Negative space also works well when the image will later be used for websites, advertisements, social media graphics, or magazine layouts because the empty area can hold typography.
Look for Leading Lines
Walls, roads, railings, architecture, shadows, and furniture can create lines that guide attention toward the person.
Strong composition turns an ordinary location into part of the visual story.
Also Read: Simple Photo Editing Tutorial for Clean and Aesthetic Photos
Choose Better Backgrounds for Portrait Photography
A distracting background can weaken an otherwise excellent photograph.
Before taking the picture, look behind the person.
Check for bright signs, poles appearing behind the head, clutter, distracting colors, or other people.
Sometimes moving only a few steps changes the entire composition.
A longer lens and wider aperture can also reduce distracting background detail.
However, background blur should not become a substitute for thoughtful location selection.
Professional portrait photographers pay attention to both the subject and everything surrounding them.
Portrait Photography Tutorial for Better Expressions
Expression often determines whether a portrait feels alive.
Instead of repeatedly asking someone to smile, start a conversation.
Ask questions, tell a light joke, or encourage the person to think about something meaningful.
Keep shooting between formal poses.
Some of the strongest portraits happen during transitional moments when the subject briefly stops thinking about being photographed.
Your own energy also influences the session.
If you appear stressed or silent, your subject may become tense. Clear communication and positive feedback can make the entire experience easier.
Portrait Editing Tutorial for Professional Results
Editing should improve the image without removing the personality of the person.
Start with global corrections.
Adjust exposure, white balance, contrast, highlights, shadows, and color.
Then refine the portrait with selective adjustments.
Keep Skin Retouching Natural
Remove temporary distractions such as small blemishes if appropriate, but avoid removing all natural texture.
Overly smooth skin can quickly make a photograph look artificial.
Professional retouching usually aims to preserve realistic texture while reducing distractions.
Improve the Eyes Carefully
Small adjustments to brightness or contrast around the eyes can make them more engaging.
Avoid making the whites of the eyes unnaturally bright or oversharpening the iris.
Subtle adjustments usually produce better results.
Use Color Grading Consistently
Color can help define your photographic style.
Some portraits benefit from warm, natural tones, while others work well with cooler or more cinematic grading.
Whatever style you choose, keep skin tones believable unless the creative concept intentionally calls for something different.
Common Portrait Photography Mistakes to Avoid
A strong portrait photography tutorial should also explain what commonly goes wrong.
One major mistake is focusing too heavily on technical settings and ignoring the subject.
Another is using an aperture so wide that only part of the face remains sharp.
Photographers may also overlook cluttered backgrounds, awkward hand positions, poor posture, or distracting highlights.
Harsh midday sunlight can create deep shadows around the eyes and nose, while incorrect white balance can make skin appear unnaturally orange, green, or blue.
Finally, avoid overshooting without direction.
Taking hundreds of nearly identical images does not automatically improve the session.
Slow down enough to observe what is working and make intentional adjustments.
Practice This Portrait Photography Tutorial With Simple Exercises
Improvement comes from repeated practice.
Choose one skill for each photo session instead of trying to master everything at once.
For example, spend one session working exclusively with window light.
During another session, practice posing and communication.
Then experiment with different focal lengths or off-camera flash.
Photographing the same subject in different lighting conditions can be especially educational because it helps you understand exactly how light changes facial shape and mood.
Review your images afterward and identify both successful decisions and recurring problems.
That review process is an important part of developing your photographic style.
Also Read: How To Photoshop On IPhone For Stunning Social Media Photos
Final Thoughts on Portrait Photography Tutorial
This portrait photography tutorial covers the essential skills needed to create more polished and professional portraits, but great photography comes from combining technical knowledge with observation and human connection.
Learn your camera well enough that settings become instinctive. Understand how different lenses change perspective. Study the direction and quality of light. Pay attention to backgrounds and composition.
Most importantly, learn how to communicate with the person in front of your camera.
A technically perfect image can still feel lifeless if the subject appears uncomfortable or disconnected.
Continue practicing the techniques in this portrait photography tutorial and adjust them to match your own creative style. As your understanding of lighting, posing, composition, focusing, and editing grows, you will become more confident behind the camera and more consistent in producing portraits that look intentional, natural, and professional.
For high-quality fonts to boost your income, check out Letter Crafted. Our professional fonts are perfect for branding, marketing, and content creation. So, don’t miss this opportunity.