
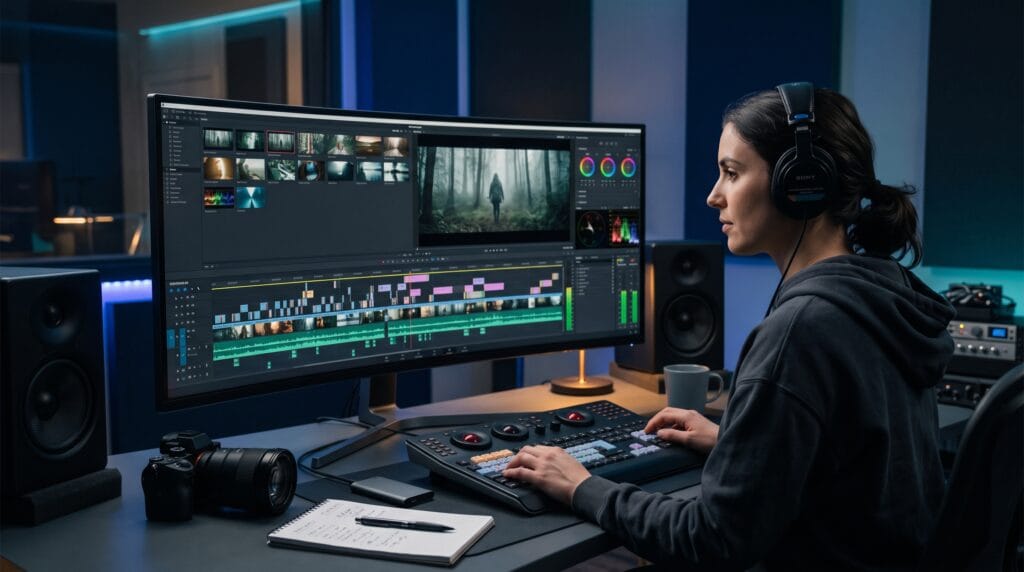
A professional video editing tutorial should teach more than how to cut clips together. Great video editing combines storytelling, pacing, sound, color, graphics, and careful organization to turn raw footage into content that keeps viewers interested. Whether you create YouTube videos, social media content, tutorials, promotional videos, or personal projects, learning a professional editing workflow can dramatically improve the quality of your work.
Video editing may seem complicated when you first open professional software and see timelines, tracks, effects, color controls, and dozens of tools. However, most polished videos are built from a relatively small set of techniques used consistently.
This guide walks through those techniques step by step.
Video Editing Tutorial – Start With the Right Software
Before editing, choose software that fits your experience, computer, and type of content.
Popular options include Adobe Premiere Pro, DaVinci Resolve, Final Cut Pro, CapCut, and other editing applications. Each platform has different tools and workflows, but the basic principles of professional editing remain similar.
Do not spend too much time searching for the “perfect” editor.
The best software is usually the one that lets you organize footage, create precise cuts, manage audio, correct color, add graphics, and export in the formats you need.
For beginners, learning one application deeply is usually more valuable than constantly switching between programs.
A good video editing tutorial should focus on transferable editing principles rather than software-specific shortcuts alone.
Organize Your Files Before Editing
Professional editing starts before anything reaches the timeline.
Poor organization can waste hours when projects become larger.
Create a clear folder structure for each project. You might separate files into:
- Video footage
- Audio recordings
- Music
- Sound effects
- Images
- Graphics
- Logos
- Project files
- Exports
Inside your editing software, create similar folders or bins.
You can also organize footage according to camera, location, scene, speaker, or shooting day.
Rename important files when necessary so that you can quickly understand what they contain.
This simple step makes the entire editing process faster.
Video Editing Tutorial for Building a Rough Cut
The rough cut is the first complete version of your video.
At this stage, focus on structure rather than perfection.
Review your footage and select the clips that contribute to the story or message. Place them on the timeline in a logical sequence.
For a tutorial video, this might mean arranging the introduction, explanation, demonstration, examples, and conclusion.
For a vlog or documentary-style video, the sequence may follow events chronologically.
Avoid spending too much time correcting colors or adding effects during the rough cut.
Your goal is to answer one important question:
Does the video work as a story?
If a scene does not contribute useful information, emotion, context, or entertainment, consider removing it.
Professional editors are often willing to delete good-looking footage when it does not strengthen the final video.
Learn Clean Cuts for Professional Video Editing
Cuts are the foundation of editing.
You do not need complicated visual effects to create professional-looking videos. Clean, well-timed cuts are often more effective.
Remove unnecessary pauses, mistakes, repetition, and sections where nothing meaningful happens.
For talking-head content, cutting out long gaps can immediately make the presentation feel more confident.
However, avoid making every sentence feel unnaturally rushed.
Good pacing gives viewers enough time to understand information without letting the video become slow.
Use Jump Cuts Carefully
Jump cuts are common in YouTube videos, tutorials, interviews, and social media content.
They remove unnecessary time between sections of dialogue.
Used intentionally, jump cuts can create energy.
Used excessively, they may make the speaker appear visually restless.
B-roll, camera angle changes, graphics, or subtle reframing can help hide distracting jump cuts.
Video Editing Tutorial for Better Pacing
Pacing describes how quickly or slowly information and visual changes occur.
There is no single correct pace for every video.
A fast social media advertisement may use rapid cuts, while a cinematic travel video may allow shots to remain on screen much longer.
Think about what the viewer should feel.
Fast editing can create excitement, urgency, or energy.
Slower editing can create emotion, seriousness, relaxation, or anticipation.
Your audience also matters.
Educational videos need enough breathing room for viewers to absorb information, while entertainment content may require more frequent visual changes.
One of the most valuable lessons in any video editing tutorial is learning when not to cut.
Sometimes leaving a powerful shot on screen longer creates more impact than constantly changing visuals.
Add B-Roll to Make Videos More Engaging
B-roll refers to supporting footage placed over primary footage or dialogue.
For example, if a creator talks about working from a coffee shop, B-roll could show the laptop, coffee cup, street outside, typing hands, or interior environment.
B-roll improves videos in several ways.
It provides visual variety, demonstrates what the speaker is discussing, hides cuts, and creates atmosphere.
Match B-Roll With the Story
Do not add B-roll simply because the timeline feels empty.
Choose visuals that support the narration.
- If the speaker discusses editing a photograph, show the editing process.
- If the topic is travel, show the destination.
- And if the video explains a product, show close-up footage of the product being used.
Relevant B-roll makes information easier to understand while keeping the audience visually engaged.
Use Transitions Without Overdoing Them
Beginners often discover transitions and immediately want to use them everywhere.
Professional editors are usually more selective.
A simple cut should handle most scene changes.
Cross dissolves can suggest a softer transition or passage of time. Fade-to-black transitions may work well between major sections.
More elaborate transitions can be useful for energetic social content or specific creative styles, but they should support the video rather than distract from it.
A strong video editing tutorial should emphasize that transitions are storytelling tools, not decorations.
If viewers begin noticing every transition instead of focusing on the content, the effects may be too aggressive.
Also Read: Social Media Design Tutorial with Simple Tips and Examples
Video Editing Tutorial for Professional Audio
Viewers may tolerate imperfect video quality, but poor audio can quickly make content difficult to watch.
Audio deserves as much attention as visuals.
Begin by listening for distracting background noise, inconsistent volume, excessive echo, or sudden changes between clips.
Dialogue should remain clear and understandable.
Balance Dialogue and Music
Music should support the mood without competing with the speaker.
Reduce the music level whenever dialogue is present.
When there is no dialogue, you can raise the music slightly to create more energy.
Use headphones when adjusting important audio because laptop or monitor speakers may hide problems.
Add Sound Effects With Purpose
Sound effects can add realism and impact.
Small sounds such as clicks, footsteps, whooshes, environmental ambience, or subtle interface sounds can make edits feel more polished.
However, avoid adding effects simply because they are available.
Sound design should feel natural within the visual style.
Remove Unwanted Background Noise
Many editing programs include tools for reducing constant background noise.
These can help with air conditioners, computer fans, traffic, or low-level room noise.
Use noise reduction carefully.
Applying too much can make voices sound metallic or artificial.
Whenever possible, start with the cleanest recording available.
Software can improve audio, but it cannot perfectly repair every badly recorded voice.
This is why professional production and professional editing work together.
Video Editing Tutorial for Color Correction
Color correction is the process of making footage look natural and consistent.
Start by correcting exposure.
Avoid extremely bright highlights or shadows that lose important detail.
Then adjust white balance so that neutral objects look neutral and skin tones appear believable.
If footage comes from multiple cameras, try to make the clips look consistent before applying creative styling.
Correct Before You Grade
Color correction and color grading are related but different.
Correction fixes technical problems.
Color grading creates a visual style.
Do not immediately apply dramatic presets to poorly balanced footage.
First establish consistent exposure, contrast, and white balance.
Then build the creative look.
Create a Professional Color Grade
Color grading helps create mood and visual consistency.
Warm colors may create a welcoming or nostalgic feeling. Cooler tones can feel modern, calm, or dramatic.
You can adjust contrast, saturation, shadows, highlights, and individual color ranges.
Many editors also use LUTs as starting points.
However, avoid treating LUTs as one-click solutions.
A preset that works beautifully on one clip may look terrible on another because lighting and camera settings are different.
Professional color grading usually requires individual adjustments.
When following a video editing tutorial, focus first on understanding why an image needs an adjustment rather than simply copying specific slider values.
Add Text and Graphics With a Clear Hierarchy
Text can communicate titles, names, statistics, instructions, or key ideas.
Use simple typography that remains readable on different screen sizes.
Avoid filling the screen with too many fonts or styles.
A strong text hierarchy might include:
- Main title
- Section heading
- Supporting information
- Captions
Use consistent font sizes, spacing, and placement throughout the video.
For social media videos, subtitles can be particularly important because viewers may watch without sound.
Keep subtitles readable by using sufficient contrast between the text and background.
Use Motion Graphics Carefully
Motion graphics can make videos feel more polished when used intentionally.
Simple animated titles, lower thirds, callouts, arrows, or icons can help communicate information.
The animation should match the overall style.
A serious corporate video may benefit from restrained movement, while an energetic creator video can support faster, more playful graphics.
Avoid making every piece of text fly, rotate, bounce, and zoom.
Professional design often looks professional because it knows when to remain simple.
Video Editing Tutorial for Speed and Slow Motion
Changing playback speed can create dramatic or energetic effects.
Slow motion works well for emotional moments, sports, product shots, travel footage, and cinematic B-roll.
For smooth slow motion, footage should ideally be recorded at a higher frame rate than the final timeline.
Speed ramping can create dynamic transitions between normal and fast or slow motion.
Use these techniques selectively.
If every clip contains speed changes, the effect quickly loses impact.
The best video editing tutorial techniques are usually those that support the content rather than competing with it.
Also Read: Content Creation Tutorial for Better Workflow and Creativity
Improve Your Edit With J-Cuts and L-Cuts
J-cuts and L-cuts are simple techniques that make conversations and scene changes feel more natural.
With a J-cut, audio from the next clip begins before the visual changes.
For example, you may hear someone speaking before the video cuts to that person.
With an L-cut, audio from the previous clip continues after the visual has changed.
These techniques are common in documentaries, interviews, films, and professional YouTube videos.
They create smoother transitions than cutting audio and video at exactly the same moment.
Watch the Entire Video Before Exporting
Before exporting, watch the finished project from beginning to end.
Do not constantly stop unless you notice a problem.
Viewing the video like a real audience member can reveal issues that are difficult to notice while editing small sections.
Look for:
- Awkward cuts
- Long pauses
- Audio changes
- Spelling mistakes
- Missing graphics
- Unnecessary repetition
- Incorrect colors
- Black frames
- Distracting transitions
- Inconsistent volume
Then make another pass specifically for technical details.
Professional editing includes quality control.
Video Editing Tutorial for Export Settings
Export settings depend on where your video will be published.
In most cases, match your export resolution and frame rate to your project timeline.
Common resolutions include 1920 × 1080 for Full HD and 3840 × 2160 for 4K.
H.264 remains a common delivery format for online video because it offers a practical balance between quality and file size.
Your editing software may provide presets for YouTube, social platforms, or other destinations.
These presets can provide useful starting points.
Always watch at least part of the final exported file before uploading it.
Occasionally, an export can contain issues that were not visible inside the editing timeline.
Common Video Editing Mistakes to Avoid
A useful video editing tutorial should also help you recognize habits that make videos feel less professional.
One common mistake is adding too many effects.
Another is choosing music that competes with dialogue.
Poor pacing can also cause viewers to lose interest, especially when an introduction takes too long to reach the main topic.
Other common problems include inconsistent color, excessive transitions, unreadable text, inaccurate subtitles, abrupt audio cuts, and overusing zoom effects.
Technical mistakes matter, but storytelling problems are often more damaging.
A beautifully color-graded video can still feel boring if the structure is weak.
Build a Faster Professional Editing Workflow
Editing becomes faster through organization and repetition.
Learn keyboard shortcuts for tools you use frequently.
Create reusable folders, title styles, audio presets, and export presets.
If you regularly produce similar videos, consider creating a project template.
For example, a YouTube template might already contain tracks for dialogue, music, B-roll, subtitles, graphics, and sound effects.
Do not confuse faster editing with rushed editing.
The goal is to remove repetitive technical work so you have more time for creative decisions.
Practice This Video Editing Tutorial With Real Projects
The fastest way to improve is to edit frequently.
- Create small projects rather than waiting for one major production.
- Edit a 30-second social video.
- Then create a two-minute tutorial.
- Try editing an interview, travel montage, product video, or short documentary.
- Each type of project develops different skills.
- After finishing, watch the video again a few days later.
You will often notice pacing problems, unnecessary effects, or storytelling decisions that were difficult to see immediately after editing.
This review process helps develop stronger creative judgment.
Also Read: CapCut Tutorial for Better Video Editing Results
Final Thoughts on Video Editing Tutorial
This video editing tutorial covers the essential techniques creators can use to transform raw footage into professional-looking content.
Start with strong organization and build a clear rough cut. Refine your timing with intentional cuts, B-roll, and thoughtful pacing. Give audio the same attention as your visuals, then correct colors before creating a consistent grade.
Use typography, transitions, effects, and motion graphics with restraint.
The goal of professional editing is not to show viewers how many editing tools you know. It is to make the finished video feel clear, engaging, polished, and effortless to watch.
Continue practicing the techniques in this video editing tutorial, experiment with different types of content, and study videos you admire. Over time, your decisions will become faster and more intuitive.
Professional results come from hundreds of small choices working together. When storytelling, pacing, sound, color, and design support one another, even a simple video can feel intentional and polished.
For high-quality fonts to boost your income, check out Letter Crafted. Our professional fonts are perfect for branding, marketing, and content creation. So, don’t miss this opportunity.