
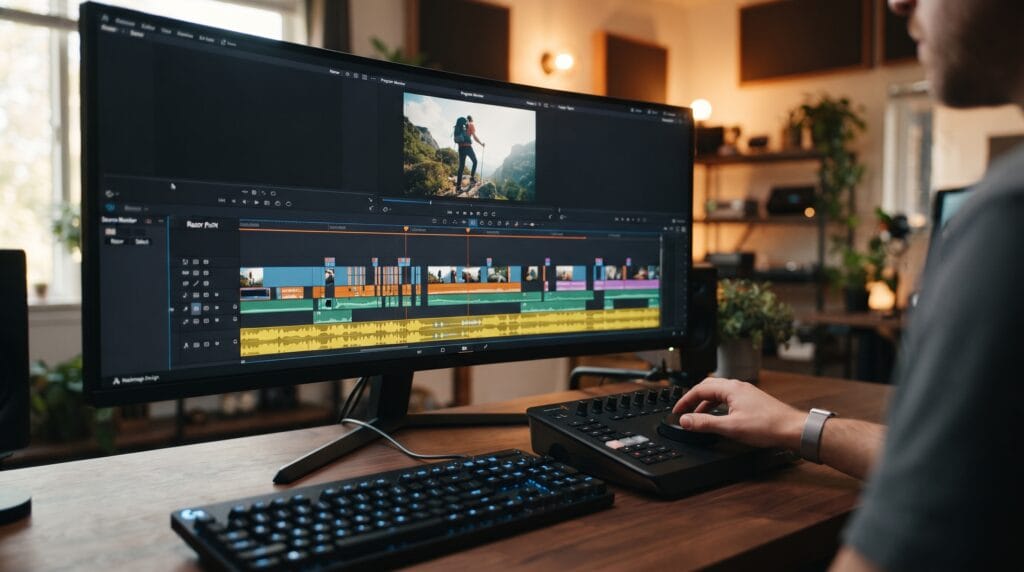
This YouTube video editing tutorial is designed for beginners and new creators who want to turn raw footage into clear, engaging, and professional-looking videos. Good editing does not require complicated effects or expensive equipment. The most important skills are choosing the right clips, removing unnecessary moments, maintaining good pacing, improving audio, and guiding viewers through the story.
Editing is where individual clips become a complete video.
A strong edit can make simple footage feel polished, while poor editing can make even high-quality footage difficult to watch.
For beginners, the process may initially seem complicated because editing software contains many tools, panels, timelines, and effects. However, you only need a small set of core skills to start producing effective YouTube content.
This YouTube video editing tutorial walks through the process step by step, from organizing files to exporting the final video.
Start Your YouTube Video Editing Tutorial With a Clear Goal
Before opening your editing software, decide what the video needs to accomplish.
Ask yourself:
- What is the main topic?
- Who is the video for?
- What should viewers learn or feel?
- What is the most important part of the video?
- How long should the finished video be?
A tutorial, vlog, review, commentary video, and product demonstration may all require different editing styles.
For example, a tutorial usually needs clear explanations and useful close-ups.
A vlog may rely more on pacing, music, and visual variety.
Knowing the goal helps you decide which footage to keep and which footage to remove.
Choose Video Editing Software You Can Learn Easily
You do not need the most advanced software when you are starting.
Look for an editor that provides the basic features you need, including:
- Cutting clips
- Multiple video tracks
- Audio editing
- Text
- Transitions
- Basic color adjustment
- Export controls
Popular editing applications offer different levels of complexity, but the fundamental workflow remains similar.
The most useful software is often the one you can learn consistently.
Avoid switching between several editors before understanding the basics.
Organize Your Footage Before Editing
One of the most important lessons in any YouTube video editing tutorial is file organization.
Create folders before importing footage.
A simple structure could include:
- Main footage
- B-roll
- Audio
- Music
- Images
- Graphics
- Exported videos
Rename files when necessary.
Instead of leaving clips with names such as IMG_4832, use meaningful names such as:
- intro-take-1
- product-closeup
- screen-recording-login
Organized files can save a surprising amount of editing time.
Create Your Editing Project Correctly
When starting a new project, match the settings to your recorded footage when possible.
Important settings include:
- Resolution
- Frame rate
- Aspect ratio
For standard YouTube videos, a horizontal 16:9 frame is common.
Vertical content such as Shorts uses a different format.
Keeping your timeline settings consistent with your footage helps avoid unnecessary scaling or motion problems later.
Build a Rough Cut First
The rough cut is the first version of your video.
Do not worry about transitions, color, sound effects, or graphics yet.
Focus only on creating the basic story.
Place your main clips on the timeline and remove obvious mistakes.
Cut:
- False starts
- Long pauses
- Repeated sentences
- Unnecessary explanations
- Technical interruptions
- Off-topic sections
The goal is to create a watchable sequence from beginning to end.
This is an essential part of the YouTube video editing tutorial workflow because it gives you a strong foundation before adding detail.
Learn How to Make Clean Cuts
Cuts are the most important editing tool.
Beginners sometimes rely heavily on transitions because they feel more professional.
In reality, clean cuts usually create better videos.
Use a cut when:
- A sentence ends
- The topic changes
- You want to remove a mistake
- You want to shorten a pause
- You want to switch camera angles
Good cuts should feel natural.
The viewer should focus on the message rather than constantly noticing the editing.
Improve Video Pacing
Pacing determines how quickly the video feels.
If your video moves too slowly, viewers may lose interest.
If it moves too quickly, viewers may struggle to follow the information.
Remove moments that do not add value.
This may include:
- Long breaths
- Repeated ideas
- Empty pauses
- Slow introductions
- Unnecessary setup
However, do not remove every pause.
Natural breathing room can improve comprehension.
Good pacing is about balance rather than constant speed.
Create a Strong Opening
The first part of the video is especially important.
Avoid beginning with a long introduction that does not immediately help the viewer.
Instead, quickly communicate:
- What the video is about
- Why it matters
- What viewers will get from watching
For example, rather than spending 30 seconds introducing yourself, you might show the finished result and then explain how the video will help viewers achieve it.
A focused opening improves the entire viewing experience.
Use Jump Cuts Carefully
Jump cuts are common in YouTube videos.
They occur when part of a continuous clip is removed, creating an obvious visual jump.
Jump cuts can help remove:
- Pauses
- Mistakes
- Repeated words
- Slow sections
They are useful for talking-head videos.
However, excessive jump cuts may make the video feel nervous or uncomfortable.
You can sometimes hide them using:
- B-roll
- Screen recordings
- Cutaway shots
- Small reframing changes
Use them when they improve pacing rather than simply because they are common.
Add B-Roll to Your YouTube Video Editing Tutorial Workflow
B-roll is supporting footage that appears over the main narration.
For example, if you are explaining how to make coffee, your B-roll might show:
- Coffee beans
- Grinding
- Brewing
- Pouring
- Finished coffee
B-roll makes videos more visually interesting and can help explain what you are talking about.
It is also useful for hiding cuts.
When adding B-roll, make sure every clip has a reason to appear.
Avoid adding random footage that does not support the topic.
Also Read: Photoshop Editing Tutorial Step by Step for Better Results
Use Screen Recordings When They Improve Clarity
For software tutorials, design videos, website guides, or technical content, screen recordings can be extremely useful.
Zoom in when necessary.
Make sure text remains readable.
If the interface is complicated, highlight the area viewers should focus on.
Screen recordings should support your explanation rather than forcing viewers to search the screen for the relevant detail.
Edit Audio Before Adding Fancy Effects
Audio quality can affect perceived video quality more than many visual effects.
Viewers may tolerate simple visuals, but poor audio can quickly become frustrating.
During your YouTube video editing tutorial workflow, check:
- Dialogue volume
- Background noise
- Music level
- Sudden volume changes
- Unwanted clicks
- Distortion
Keep spoken audio clear and consistent.
If possible, use basic noise reduction carefully.
Too much processing can make voices sound unnatural.
Balance Background Music
Background music should support the video rather than compete with the speaker.
Lower the music when someone is talking.
Increase it slightly during:
- Montages
- Intros
- Transitions
- B-roll sections
If viewers need to strain to understand the voice, the music is too loud.
Choose music that fits the pace and mood of the video.
Also make sure you have appropriate rights or licensing to use any music in your content.
Use Sound Effects With Restraint
Sound effects can emphasize actions and transitions.
Examples include:
- Clicks
- Pops
- Whooshes
- Notification sounds
- Subtle impact sounds
They can make editing feel more dynamic.
However, using a sound effect every few seconds can become distracting.
Use them when they support a visual moment.
Add Text to Improve Understanding
Text can reinforce important information.
Useful text elements include:
- Titles
- Section headings
- Key points
- Names
- Numbers
- Instructions
Keep text short.
Do not force viewers to read long paragraphs while listening to narration.
Use readable fonts and strong contrast.
Text should remain visible long enough for viewers to understand it comfortably.
Keep YouTube Video Typography Consistent
A simple typography system can make your channel look more professional.
Choose:
- One primary font
- One optional secondary font
- Consistent text sizes
- Consistent placement
- Consistent animation style
Avoid using several unrelated fonts within one video.
Consistency helps build a recognizable visual identity across your channel.
Use Transitions Sparingly
Transitions can connect scenes, but most clips do not require special effects.
Simple cuts are usually enough.
Useful transitions may include:
- Dissolve
- Fade
- Simple slide
- Dip to black
Reserve more noticeable transitions for meaningful section changes.
If every cut uses a different effect, the editing can feel amateur rather than professional.
Correct Basic Color and Exposure
Color correction helps make clips look consistent.
Start with basic adjustments.
Check:
- Exposure
- Contrast
- White balance
- Highlights
- Shadows
- Saturation
Do not immediately apply heavy cinematic effects.
First make sure skin tones look natural and clips match each other reasonably well.
Basic correction often improves a video more than aggressive color grading.
Keep Color Grading Consistent
After correcting technical problems, you may add a visual style.
For example, you might want the video to feel:
- Warm
- Bright
- Clean
- Cinematic
- Soft
- High contrast
Keep the look consistent throughout the video.
Avoid applying different dramatic color styles to every clip unless there is a storytelling reason.
Add Zooms and Motion Carefully
Small zooms can help emphasize important moments.
They are common in:
- Tutorials
- Commentary videos
- Reviews
- Talking-head content
However, constant zooming can become distracting.
Use motion to direct attention.
For example, zoom slightly when highlighting an important statement or detail.
Avoid adding movement only because the frame feels static.
Also Read: Content Creation Tutorial for Better Workflow and Creativity
Use Graphics to Explain Complex Ideas
Graphics can make information easier to understand.
Examples include:
- Arrows
- Circles
- Labels
- Charts
- Icons
- Simple diagrams
Keep them visually consistent.
If your channel regularly uses instructional graphics, create templates so future videos maintain the same design language.
Review Your Video Without Editing
Once the first full edit is complete, stop adjusting individual clips and watch the video from beginning to end.
Pretend you are a viewer.
Ask:
- Is the introduction too long?
- Are any sections confusing?
- Does the pace slow down?
- Is the audio consistent?
- Are text elements readable?
- Does the ending feel complete?
Take notes while watching.
Then return to the timeline and make corrections.
This is one of the most useful steps in a YouTube video editing tutorial because editors often become too familiar with their own timeline.
Remove Anything That Does Not Help the Viewer
Many beginner videos are longer than necessary.
Before exporting, review every section.
Ask:
Does this clip add information, emotion, context, or entertainment?
If not, consider removing it.
Shortening a video does not automatically make it better, but removing unnecessary content usually improves pacing.
Create a Clear Ending
The ending should not feel abrupt.
Summarize the main takeaway when appropriate.
You can also guide viewers toward the next step.
For example:
- Try the technique
- Watch another related video
- Download a resource
- Subscribe for similar content
Keep the ending focused.
Avoid adding several unrelated calls to action at once.
Export Settings in a YouTube Video Editing Tutorial
When your edit is complete, export a high-quality video file.
Check:
- Resolution
- Frame rate
- Video quality
- Audio quality
- File format
In most cases, you should export at the same resolution and frame rate used during editing unless you have a specific reason to change them.
Do not compress the video excessively simply to create a smaller file.
After exporting, watch part of the final file before uploading.
Check for:
- Missing audio
- Black frames
- Glitches
- Incorrect text
- Export errors
Save Your Project Files
Do not immediately delete everything after publishing.
Keep important materials organized.
You may want to save:
- Final project file
- Thumbnail
- Graphics
- Music records
- Final export
- Original footage when practical
Previous projects can become useful templates for future videos.
Common YouTube Video Editing Mistakes
Beginners often make similar mistakes.
Using Too Many Effects
More effects do not automatically create better editing.
Making the Intro Too Long
Give viewers a reason to continue quickly.
Ignoring Audio
Clean dialogue should be a priority.
Using Too Much B-Roll
Supporting footage should support the story.
Overusing Transitions
Simple cuts usually look more professional.
Making Text Difficult to Read
Use clear fonts and sufficient contrast.
Editing Without Organization
Poor file management wastes time.
Trying to Make Every Clip Perfect
Focus on the overall viewing experience.
YouTube Video Editing Tutorial Workflow
A simple repeatable workflow can make editing much faster.
1. Organize Footage
Create clear folders and file names.
2. Import Everything
Bring your selected footage into the editing project.
3. Build the Rough Cut
Arrange the main story and remove obvious mistakes.
4. Refine Pacing
Shorten pauses and unnecessary sections.
5. Add B-Roll
Support key ideas visually.
6. Improve Audio
Balance dialogue, music, and sound effects.
7. Add Text and Graphics
Use only what improves communication.
8. Correct Color
Create visual consistency.
9. Review the Full Video
Watch it without stopping.
10. Export and Check
Render the final file and review it before uploading.
Following the same YouTube video editing tutorial workflow repeatedly can help new creators become faster and more confident.
YouTube Video Editing Checklist
Before uploading, check:
- Is the opening interesting?
- Are unnecessary pauses removed?
- Is the pacing comfortable?
- Is dialogue easy to hear?
- Is music low enough?
- Does B-roll support the narration?
- Are text elements readable?
- Are fonts consistent?
- Are transitions necessary?
- Do clips have consistent color?
- Are important graphics visible long enough?
- Does the ending feel complete?
- Is the export resolution correct?
- Did you review the final rendered file?
A checklist can prevent simple mistakes from reaching your published videos.
Also Read: CapCut Tutorial for Better Video Editing Results
Final Thoughts on YouTube Video Editing Tutorial
A good YouTube video editing tutorial should help beginners understand that professional-looking editing is built from simple decisions repeated consistently.
You do not need dozens of effects.
Start with clean cuts, clear audio, useful B-roll, readable text, consistent color, and good pacing.
Focus first on helping the viewer understand and enjoy the video.
As your skills improve, you can experiment with more advanced motion graphics, color grading, sound design, and storytelling techniques.
The most important part is building a repeatable process.
Organize your footage, create a rough cut, refine the story, improve audio and visuals, review the complete edit, and export carefully.
With practice, this YouTube video editing tutorial workflow becomes faster and more natural.
Every video you edit teaches you something about timing, storytelling, clarity, and audience attention.
Keep the process simple, continue experimenting, and use each new upload as an opportunity to make the next video better.
For high-quality fonts to boost your income, check out Letter Crafted. Our professional fonts are perfect for branding, marketing, and content creation. So, don’t miss this opportunity.